

Before we start the setup process for Espresso for testing, it is recommended to turn off the following system settings on your virtual or physical device(s).
- On your device, under Settings->Developer options disable the following 3 settings:
- Window animation scale
- Transition animation scale
- Animator duration scale
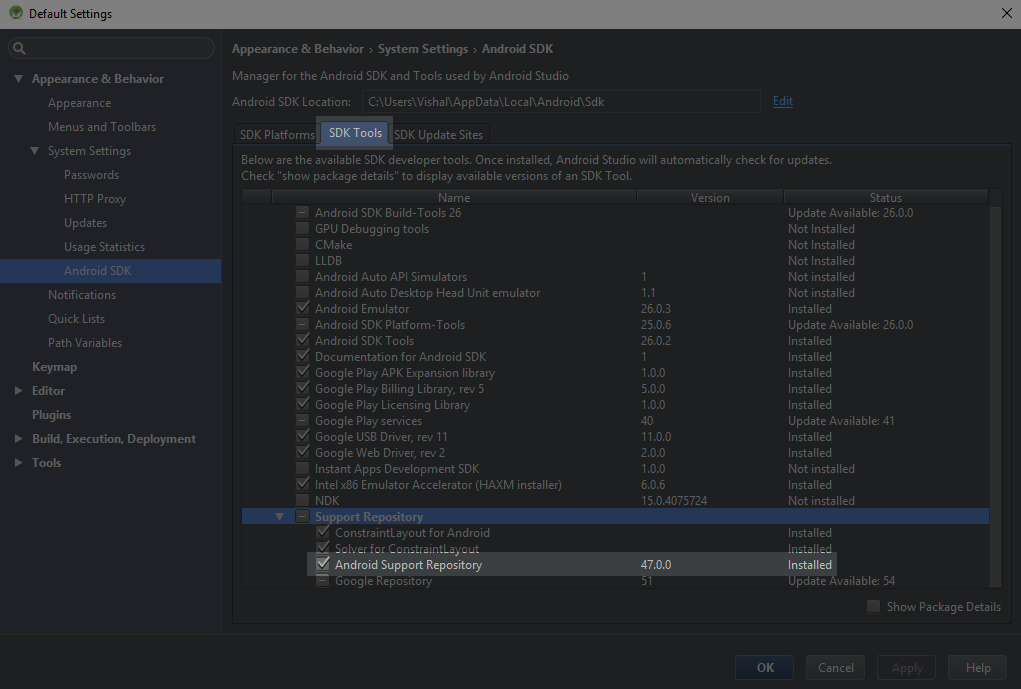
Download Espresso
Make sure you have installed the latest Android Support Repository under Extras.
Open your app’s build.gradle file. This is usually not the top-level build.gradle file but app/build.gradle.
Add the following lines inside dependencies:
androidTestCompile 'com.android.support.test.espresso:espresso-core:2.2.2'
androidTestCompile 'com.android.support.test:runner:0.5'
Here is the list of few more artifacts available for Espresso.
// Espresso core
androidTestCompile 'com.android.support.test.espresso:espresso-core:2.2.2'
// Espresso-contrib for DatePicker, RecyclerView, Drawer actions, Accessibility checks, CountingIdlingResource
androidTestCompile 'com.android.support.test.espresso:espresso-contrib:2.2.2'
// Espresso-web for WebView support
androidTestCompile 'com.android.support.test.espresso:espresso-web:2.2.2'
// Espresso-idling-resource for synchronization with background jobs
androidTestCompile 'com.android.support.test.espresso:espresso-idling-resource:2.2.2'
// Espresso-intents for validation and stubbing of Intents
androidTestCompile 'com.android.support.test.espresso:espresso-intents:2.2.2'
Set the instrumentation runner
Add to the same build.gradle file the following line in android.defaultConfig:
testInstrumentationRunner "android.support.test.runner.AndroidJUnitRunner"
Example build.gradle file
apply plugin: 'com.android.application'

android {
    compileSdkVersion 25
    buildToolsVersion "26.0.0"

    defaultConfig {
        applicationId "in.developersjournal.app"
        minSdkVersion 15
        targetSdkVersion 25
        versionCode 1
        versionName "1.0"

        testInstrumentationRunner "android.support.test.runner.AndroidJUnitRunner"
    }
}

dependencies {
    // App's dependencies, including test
    compile 'com.android.support:support-annotations:22.2.0'

    // Testing-only dependencies
    androidTestCompile 'com.android.support.test:runner:0.5'
    androidTestCompile 'com.android.support.test.espresso:espresso-core:2.2.2'
}

Add the first test
Android Studio creates tests by default in src/androidTest/java/com.example.package/
androidTest is the location where Android uses Connected Tests. For more information please check out the following Getting Started with Android Testing.
Example JUnit4 test using Rules:
@RunWith(AndroidJUnit4.class)
@LargeTest
public class HelloWorldEspressoTest {

    @Rule
    public ActivityTestRule<MainActivity> mActivityRule = new ActivityTestRule(MainActivity.class);

    @Test
    public void listGoesOverTheFold() {
        onView(withText("Hello world!")).check(matches(isDisplayed()));
    }
}
Running tests in Android Studio
Create a test configuration
In Android Studio:
- Open Run menu -> Edit Configurations
- Add a new Android Tests configuration
- Choose a module
- Add a specific instrumentation runner:
android.support.test.runner.AndroidJUnitRunner
Run the newly created configuration.
From command-line via Gradle
Execute
./gradlew connectedAndroidTest